Guide / Processing Seestar FITS
Guide
How to process Seestar S30 Pro FITS files
You pointed a Seestar at something, it worked for an hour, and you came away with a FITS file that opens almost completely black. This is what you actually have, what to do with it, and — the part nobody shows you — what it looks like when you go too far.
Why your file looks black
This is a real stacked master of the North America Nebula. One hour of exposure, 182 frames, and this is genuinely what it looks like when you open it:
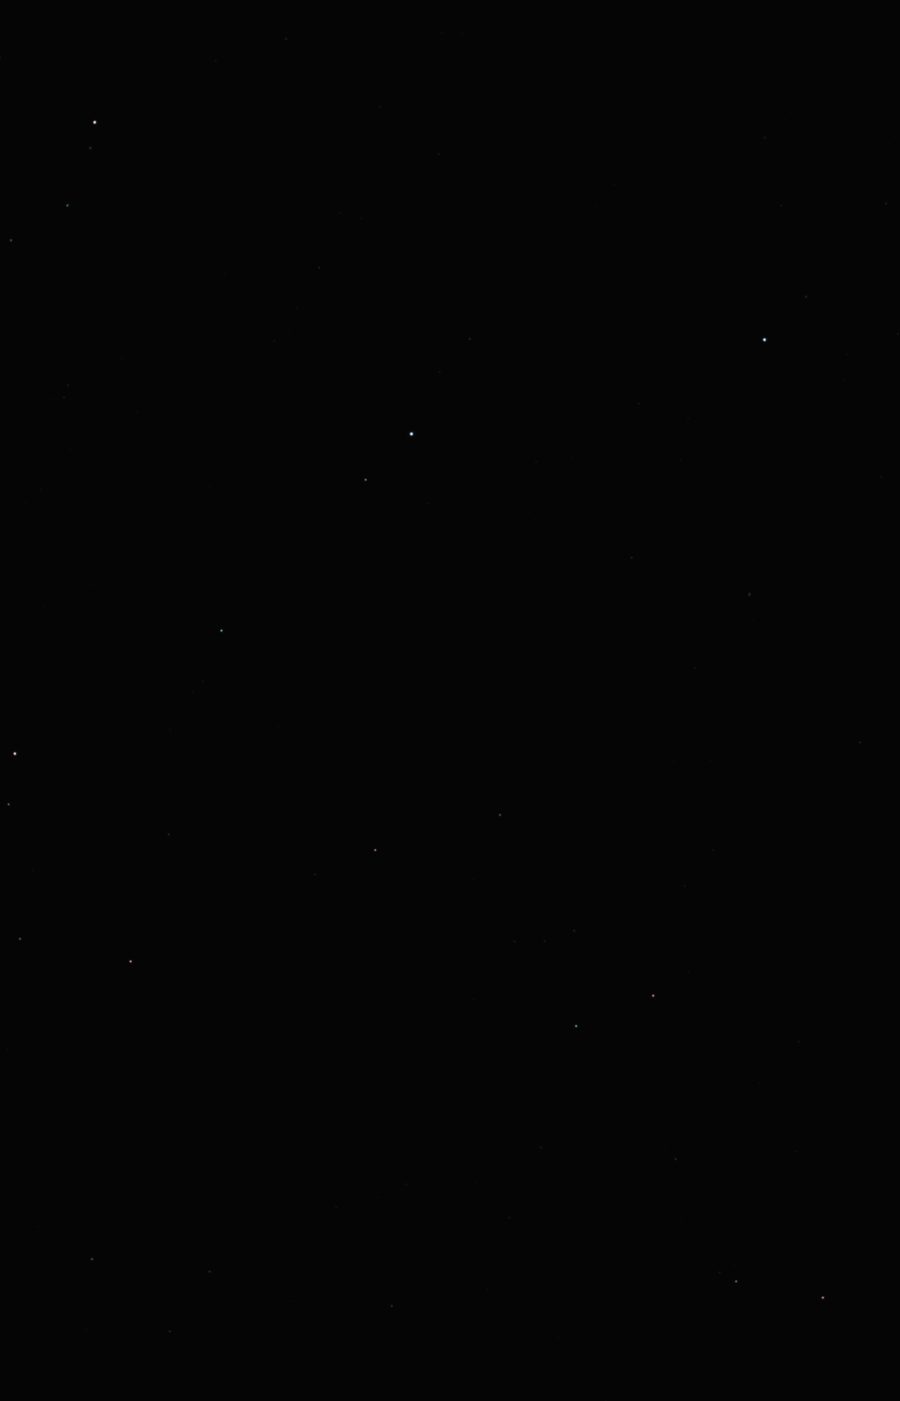
Nothing is broken. Your camera records linear data — each pixel value is directly proportional to how many photons landed there. Nebulosity is extraordinarily faint, so almost every pixel sits within a hair of zero. On a screen that maps 0 to black and 1 to white, a value of 0.003 is black.
The nebula is in there. Making it visible is called stretching, and it is the single most important idea in astrophotography processing: a deliberate, non-linear brightening that lifts the faint signal into the range your eyes can see while keeping the bright parts from blowing out.
That is why a raw astro file cannot simply be "brightened" in a photo editor. Brightening is linear; it lifts everything equally, including the noise, and blows the stars out long before the nebula appears.
What the Seestar actually gives you
Depending on how you shot and exported, you have one of two things — and it genuinely matters which.
A stacked master (one file)
The Seestar has already aligned and combined your frames. One FITS, ready to process. This is the quick path, it is perfectly legitimate, and it is where most people should start.
What you give up: the stacking decisions were made for you. Frames ruined by cloud, satellites, wind or a bumped tripod are already baked in, and you cannot take them back out.
The individual subframes (many files)
Every exposure, separately. More work, and worth it when you have enough frames for rejection to mean something — you can grade them, discard the bad ones, and integrate only what is good.
How to choose: rejection only helps when there are enough frames for "this one disagrees with the others" to be a meaningful statement. A short session of a handful of frames has little to gain; a long one with a couple of hundred has a lot, and the difference shows up most on the frames you would never otherwise know were dragging your result down. If you kept the subs, it costs you nothing to try both and compare.
The order things happen in, and why
The sequence below is not arbitrary. Each step assumes the previous one has been done, and doing them out of order makes several of them actively harder.
- Crop the edges. Stacking leaves ragged, thinly-exposed borders where frames did not perfectly overlap. Cut them off first, because every later measurement — background, colour, contrast — is thrown off by an edge that is darker than the real sky.
- Flatten the background. Light pollution, moonlight and the sky itself leave a gradient across the frame: one corner brighter than another. Remove it before stretching, because stretching amplifies the gradient along with everything else.
- Get the colour honest. Set the white balance while the data is still linear, which is the only point at which colour is a straightforward measurement rather than a judgement. If you can measure real catalogue stars in the frame and correct against them, do that — it is objective in a way that eyeballing is not.
- Sharpen while linear (optional). Deconvolution tries to undo the blurring that the atmosphere and your optics applied to the image. That blurring is a linear operation, so the maths that reverses it expects linear data — after a stretch, the blur is no longer the simple thing the algorithm is modelling. That is why it is conventionally done here. It is a recommendation rather than a hard rule: you will not break anything by skipping it, and plenty of good images never use it at all.
- Stretch. The moment the picture appears. Everything before this was preparation.
- Adjust tone and colour. Black point, curves, saturation. Now you are making aesthetic choices rather than corrections.
- Reduce noise, then finish. Denoise after stretching, because stretching is what makes the noise visible. Then local contrast, star reduction, and whatever finishing you like.
Here is that whole sequence applied to the black frame above:
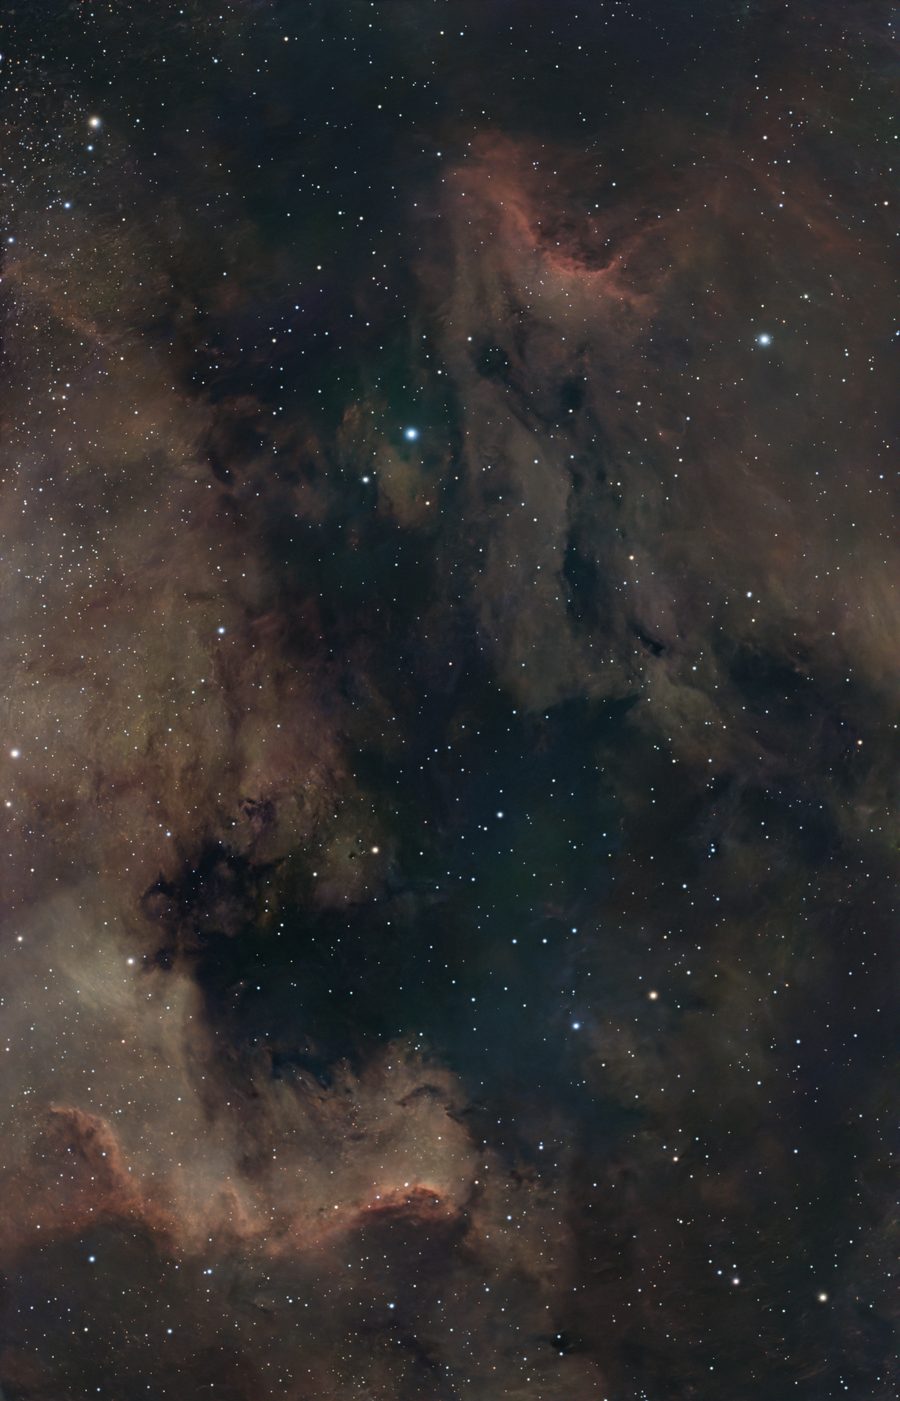
That edit took twenty-six minutes, but only because it was being screenshotted at every step. Once you know roughly which values work for your data, the whole sequence — including narrowband mapping and finishing touches — is more like five to seven minutes. The first few will take longer, and should.
Almost every processing mistake is the same mistake: doing too much of something that was working. The skill is not knowing which tools to use — it is knowing when to stop using them.
The thing nobody tells youHow little each step should do
Nocturne logs how much each step actually changed the image. That turns out to be unusually revealing, because it lets you compare your instinct about a step against what it really did. Here is the measured log from the edit above:
| Step | Setting | Change |
|---|---|---|
| Background extraction | strong | 3.2% |
| Remove green | 0.40 | 1.2% |
| Colour (photometric) | 127 stars matched | 0.0% |
| Deconvolution | medium — undone | 2.5% |
| Deconvolution | light | 1.9% |
| Levels | — | 6.2% |
| Curves | — | 2.0% |
| Noise reduction | strong | 7.0% |
| Local contrast | 0.10 | 1.1% |
Two things stand out.
The finished picture came from changes of a few percent each. Nothing in that list moved the image more than 7%. The transformation from black rectangle to finished photograph is the accumulation of small, deliberate corrections — not one dramatic move.
The strong settings and the gentle ones are not randomly distributed. Look at where "strong" appears: background extraction and noise reduction. Both are corrective — they remove something that is definitely wrong. There is no such thing as removing too much light pollution gradient; it either goes or it does not.
Now look at the gentle ones: local contrast at 0.10 out of 1.0, curves at 2%, and deconvolution set to medium, then undone and redone at light. Those are interpretive — they decide how the picture looks rather than fixing something broken. That undo is the whole lesson in one line: medium looked like too much, so it went back.
The rule that follows: be generous with corrective steps and stingy with interpretive ones. Removing a gradient, neutralising a colour cast, cleaning up noise — go as hard as the data needs. Contrast, saturation, sharpening, star reduction — start lower than feels right.
The colour step is worth a second look too: 0.0%. Photometric calibration measured 127 real stars, compared them to catalogue values, and concluded the colour was already correct. A step that does nothing is not a wasted step — it is a step that told you something.
What going too far looks like
Every tutorial shows you the successes. These are the same file, deliberately overdone, because recognising the failure is the skill that actually matters.
Stretch too aggressive
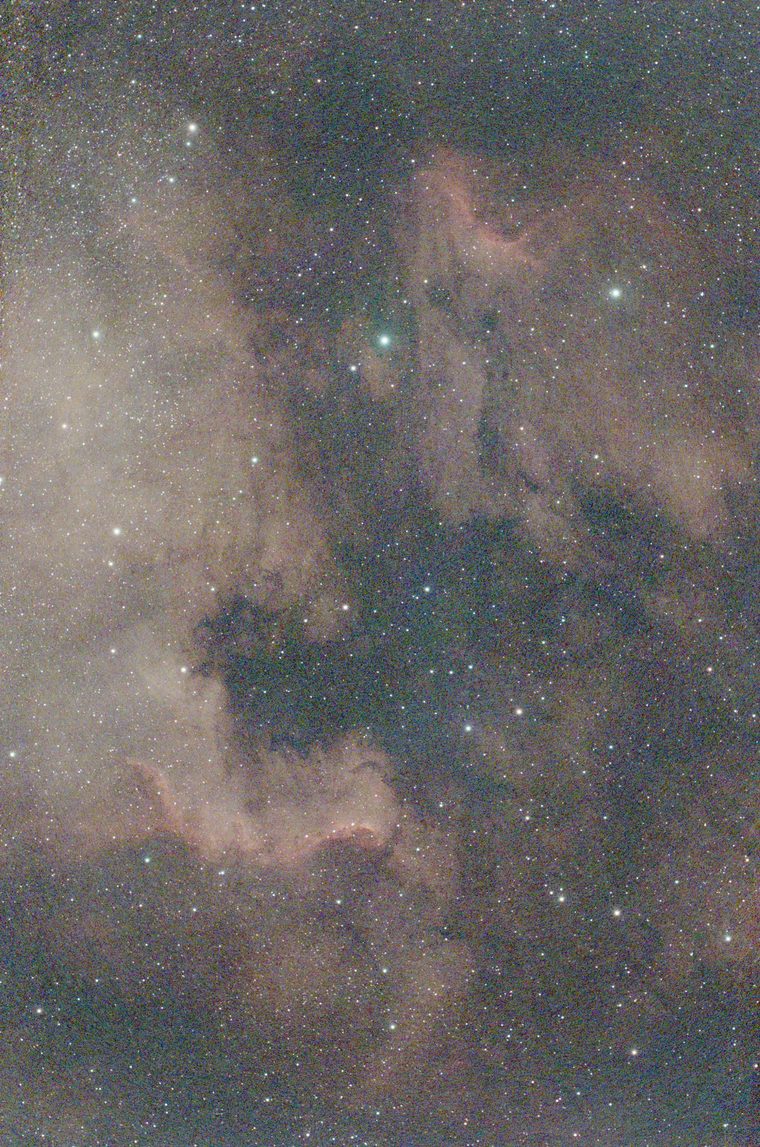
The most common mistake, and the easiest to make, because while you are dragging the slider it feels like you are revealing more. You are: you are also revealing the noise floor. The sky has gone from black to grey, every faint structure has the same brightness as every other, and the image has no depth. Tell-tale sign: nothing in the frame is genuinely dark any more.
Local contrast maxed out
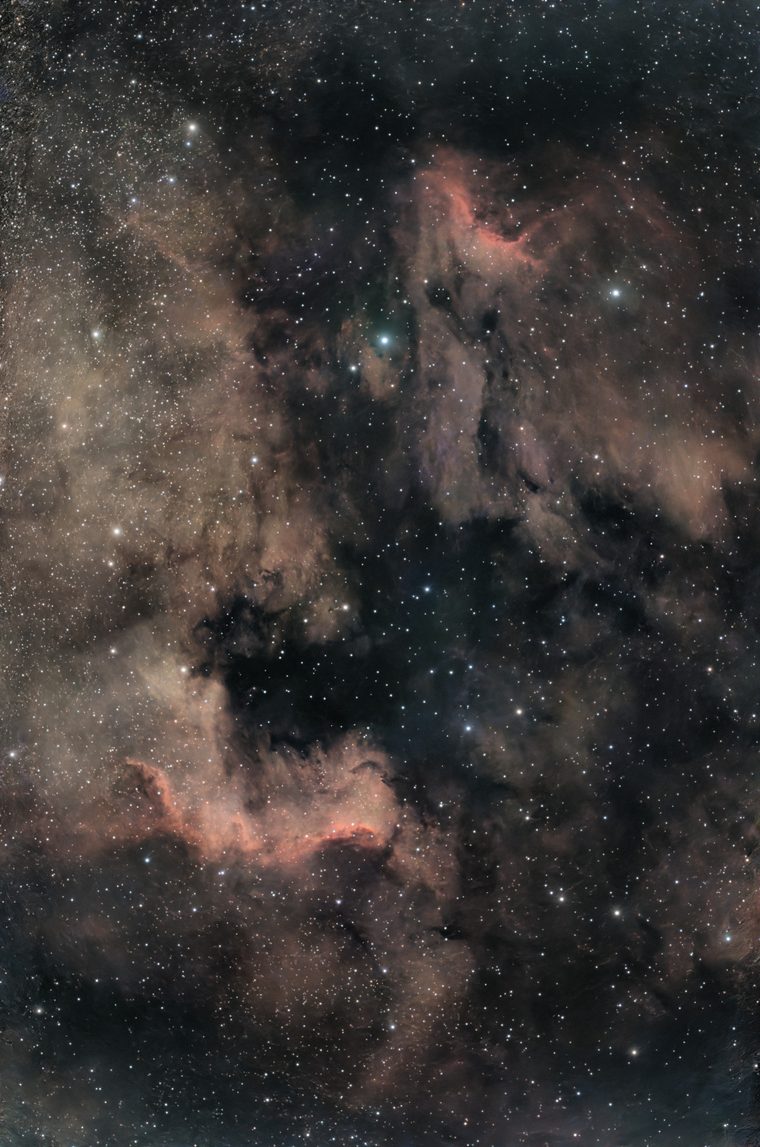
This is the dangerous one, because at a glance it looks impressive. The dust has snap and the structure leaps out. Then you notice the dark halos around every bright region, the corners going muddy, and that the nebula's soft gradation has become a crunchy texture that does not exist in the sky. Tell-tale sign: dark rims where bright meets dark.
Saturation maxed out
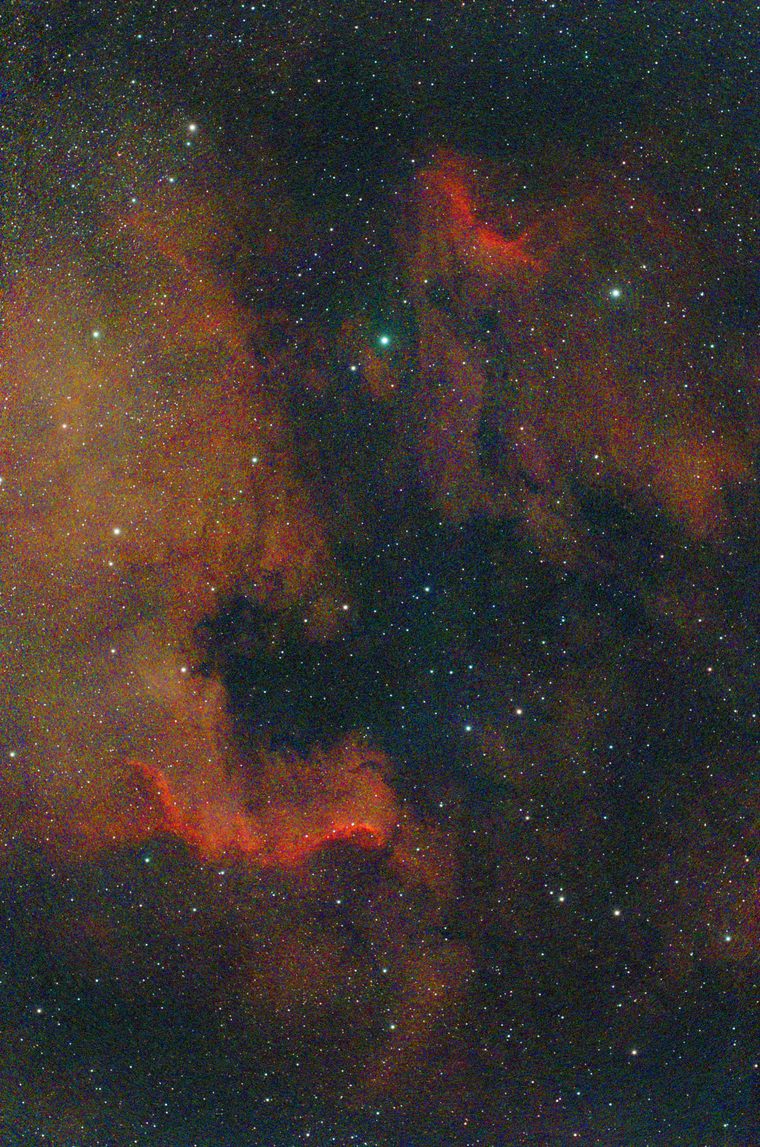
Colour is the easiest thing to overdo because more of it looks like more data. It is not. Past a point you are amplifying colour noise and whatever cast survived calibration, and the stars stop being white. Tell-tale sign: bright stars taking on a colour, and blotchy hue variation in the faint background.
Star reduction maxed out
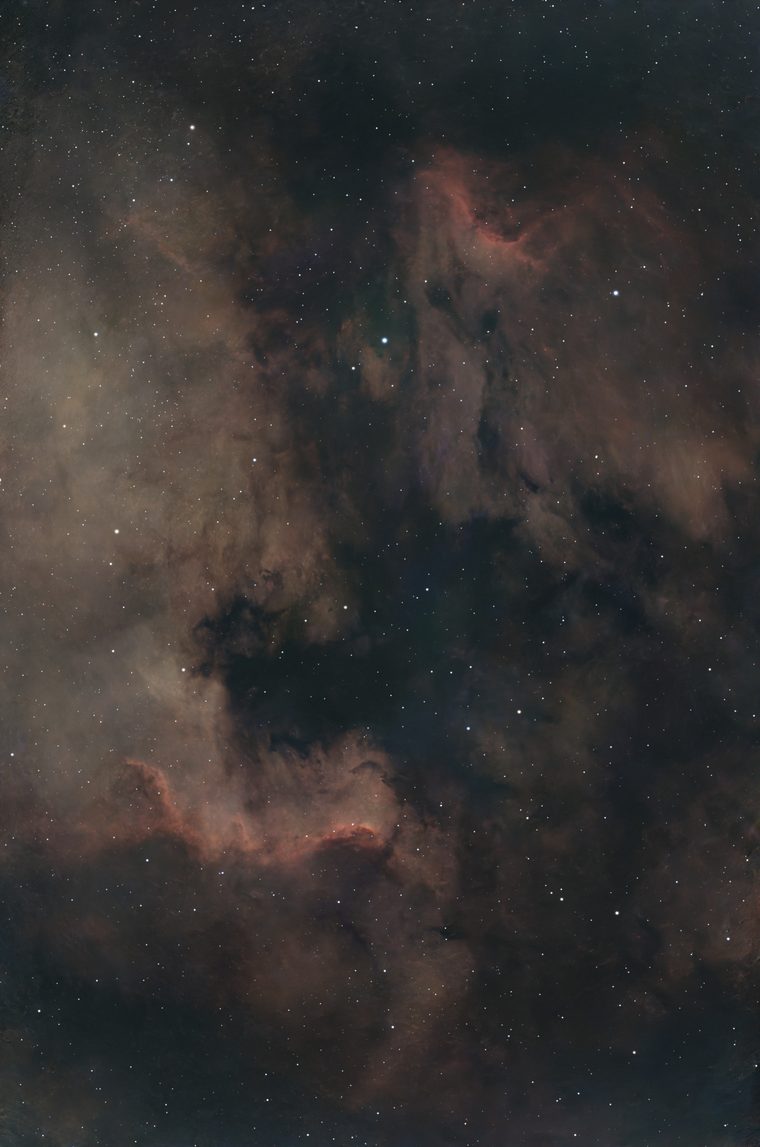
Shrinking the stars makes the nebula more prominent, so it is tempting to keep going. But the star field is part of the photograph, and an image with the stars mostly gone reads as artificial even to people who cannot say why. Tell-tale sign: a rich nebula floating in a suspiciously empty sky.
A practical habit
None of this means you should not experiment — you learn what a control does by pushing it too far and seeing what breaks. The habit that makes experimenting safe is simply this: save your project before you start going wild, and use undo freely. In the log above, the deconvolution undo happened seven seconds after the apply. That is what the feature is for.
The other habit worth building: step away and come back. Overdone processing looks fine while you are doing it, because your eye adapts as you go. It looks overdone the next morning.
Doing this in Nocturne
Nocturne is a free, open-source macOS app built specifically around this workflow for Seestar data. It walks the steps in the order above, shows a live preview of every adjustment before you commit it, keeps a full undo history, and logs the percentage changes shown in the table on this page.
It is not the only way to do any of this — the concepts above apply whatever you use. But if you have a Seestar, a Mac and a stacked FITS you are not sure what to do with, it was built for exactly that situation.
- Stacking — grade and integrate subframes yourself
- Plate Solve & Annotate — find out what is actually in your frame
- Narrowband — for dual-band Ha/OIII data
- Auto Enhance — the whole sequence in one press, if you would rather see the destination first
- The full guide — every step in detail