Knowledge base
Set up & understand Nocturne
Everything you need to get running — installing the app, the tools it works with, and what each step in the pipeline actually does.
Getting started
Nocturne turns a stacked smart-telescope image into a finished picture through a guided, non-destructive flow. Nothing you do is permanent until you export, so you can experiment freely — undo, redo, or jump back to any step.
1. Install the app
Download Nocturne for macOS and drag it to Applications. Nocturne currently runs on Apple Silicon Macs (M1 or newer) only — there's no Intel build yet. It isn't notarized either, so on first launch macOS may block it — right-click the app → Open → Open, or allow it under System Settings → Privacy & Security. You only do this once.
2. Open a stack
Choose Open FITS and pick a stacked master (.fit / .fits). Don't have a stack yet? Use Stack to point Nocturne at a folder of raw subs — it grades out the bad frames, aligns the rest (handling the field rotation from an alt-az mount), and integrates a clean master for you. If your subs cover several pointings, tick Mosaic and it stacks each panel, plate-solves them and assembles one wide image. That one needs ASTAP installed, and takes considerably longer.
No data of your own yet? Download a sample set — real Seestar captures, free to use, ready to open.
Raw data looks almost black — that is normal. Astronomical data is linear, so it stays dark until it is stretched. Nocturne previews it stretched so you can see what you are doing, and commits the real stretch when you reach that step.
Why your first open looks like nothing3. Work down the steps
Each step offers simple choices (often just Light / Medium / Strong) with a live before/after. The panel explains what the step does; once you know it, collapse the help with “How this works” and it stays out of the way. When you're happy, move on with Next.
The external tools
Nocturne drives a few best-in-class tools rather than reinventing them. They install separately — Nocturne never bundles them — and you point it at each one in Settings. Only GraXpert is really worth installing on day one; the rest are optional.
GraXpert free
Free and open source (GPL-3.0). Powers background & gradient extraction — removing light-pollution glow and vignetting — and is one of the available denoise engines.
- Download from graxpert.com (macOS build, Apple Silicon & Intel).
- Install it, then in Nocturne open Settings → GraXpert and point it at the app.
ASTAP free optional
A free plate solver. It works out exactly where a frame points, which unlocks target identification, annotation (object labels, compass, scale bar) and photometric colour calibration.
- Download ASTAP for macOS from the ASTAP page.
- You also need a star database. On the same page, download the D05 database and install it as directed — that's the right one for the Seestar's field of view.
- In Nocturne, open Settings → ASTAP, set the path, and press Test to confirm it's found.
RC-Astro optional · paid
Russell Croman's BlurXTerminator (deconvolution/sharpening), NoiseXTerminator (denoise) and StarXTerminator (star removal) are the gold standard, and Nocturne will use them if you have them. Every step that can use RC-Astro also has a free fallback, so Nocturne is fully functional without it.
- Purchase and download from rc-astro.com (one-time purchase; see the site for current pricing).
- Nocturne drives the standalone versions — you don't need PixInsight or Photoshop. Set the path in Settings, and choose your denoise engine there too.
How the pipeline works
A quick tour of the steps, in the order Nocturne walks you through them. You can skip any you don't need.
Prepare — Stack, Crop, Background
Stack builds a master from raw subs (or you open one directly). Crop trims stacking artefacts at the edges, with composition guides. Background (GraXpert) removes gradients and light-pollution glow so the sky is even and neutral — tick Show what was removed afterwards to see the gradient on its own and confirm it took sky-glow rather than the faint edges of your target.
Colour — sky balance or photometric
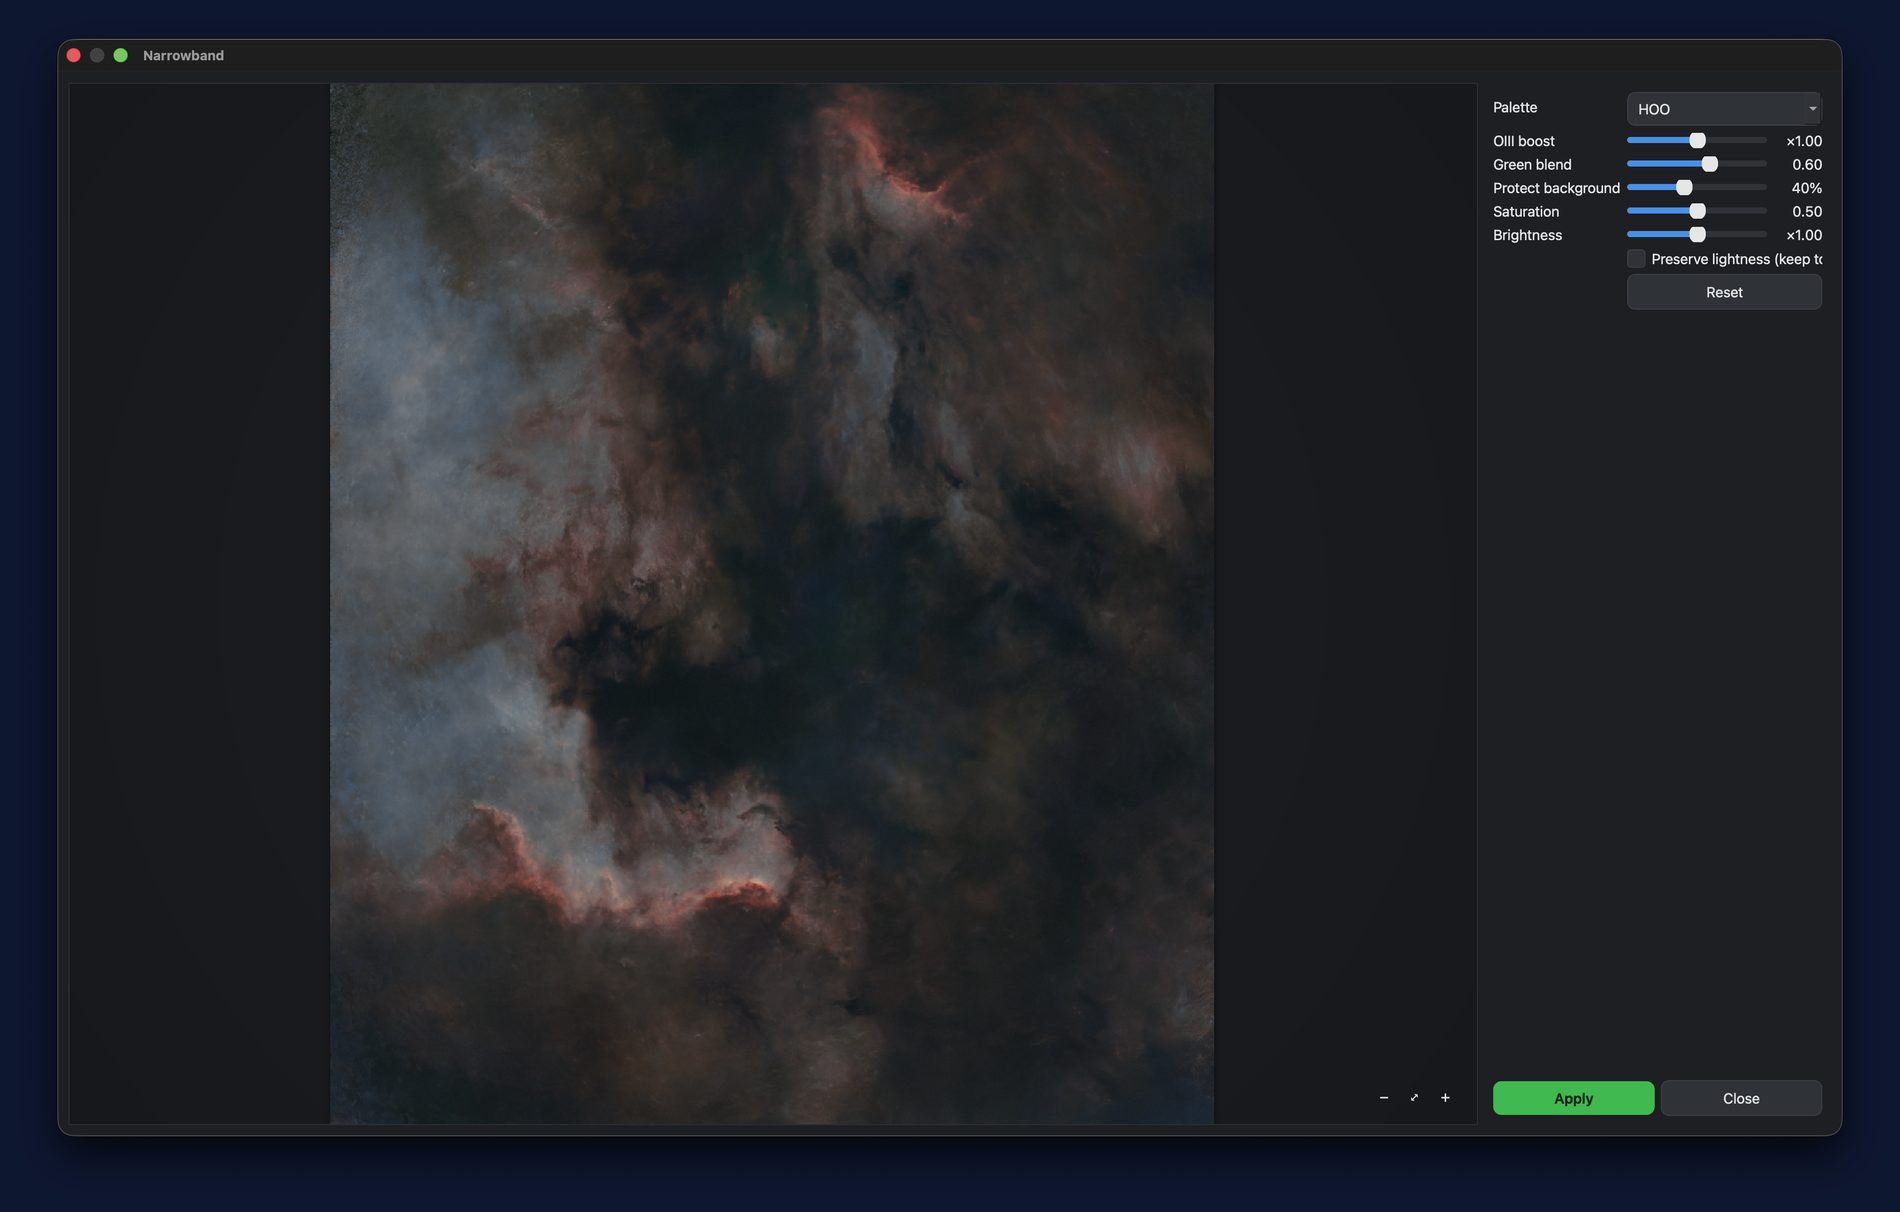
Colour neutralises the sky and sets white balance. Choose Sky balance (works offline) or Photometric (SPCC), which measures real catalogue stars in your frame to get colour objectively right. Then, if the result is not quite to your taste, two sliders — Green ↔ Magenta and Cool ↔ Warm — shift the overall colour with a live preview. They multiply the channels rather than clipping one, so the colour differences between stars survive: an orange star stays orange next to a blue one. Seestar data tends to land slightly magenta, and that is the camera rather than the stacking, so a small nudge toward green is often all it wants. If you shot a dualband/LP target, Colourise and the Narrowband tool map that Ha + OIII data into a finished two-gas colour image in a single press.
Detail & stretch
Deconvolution sharpens tight star and structure detail while the data is still linear (BlurXTerminator, or a free fallback). Stretch is the big reveal — it pulls the faint signal up into the visible range. Recover Core tames blown-out galaxy and nebula cores (HDR), and Levels and Curves fine-tune the tones.
Finish
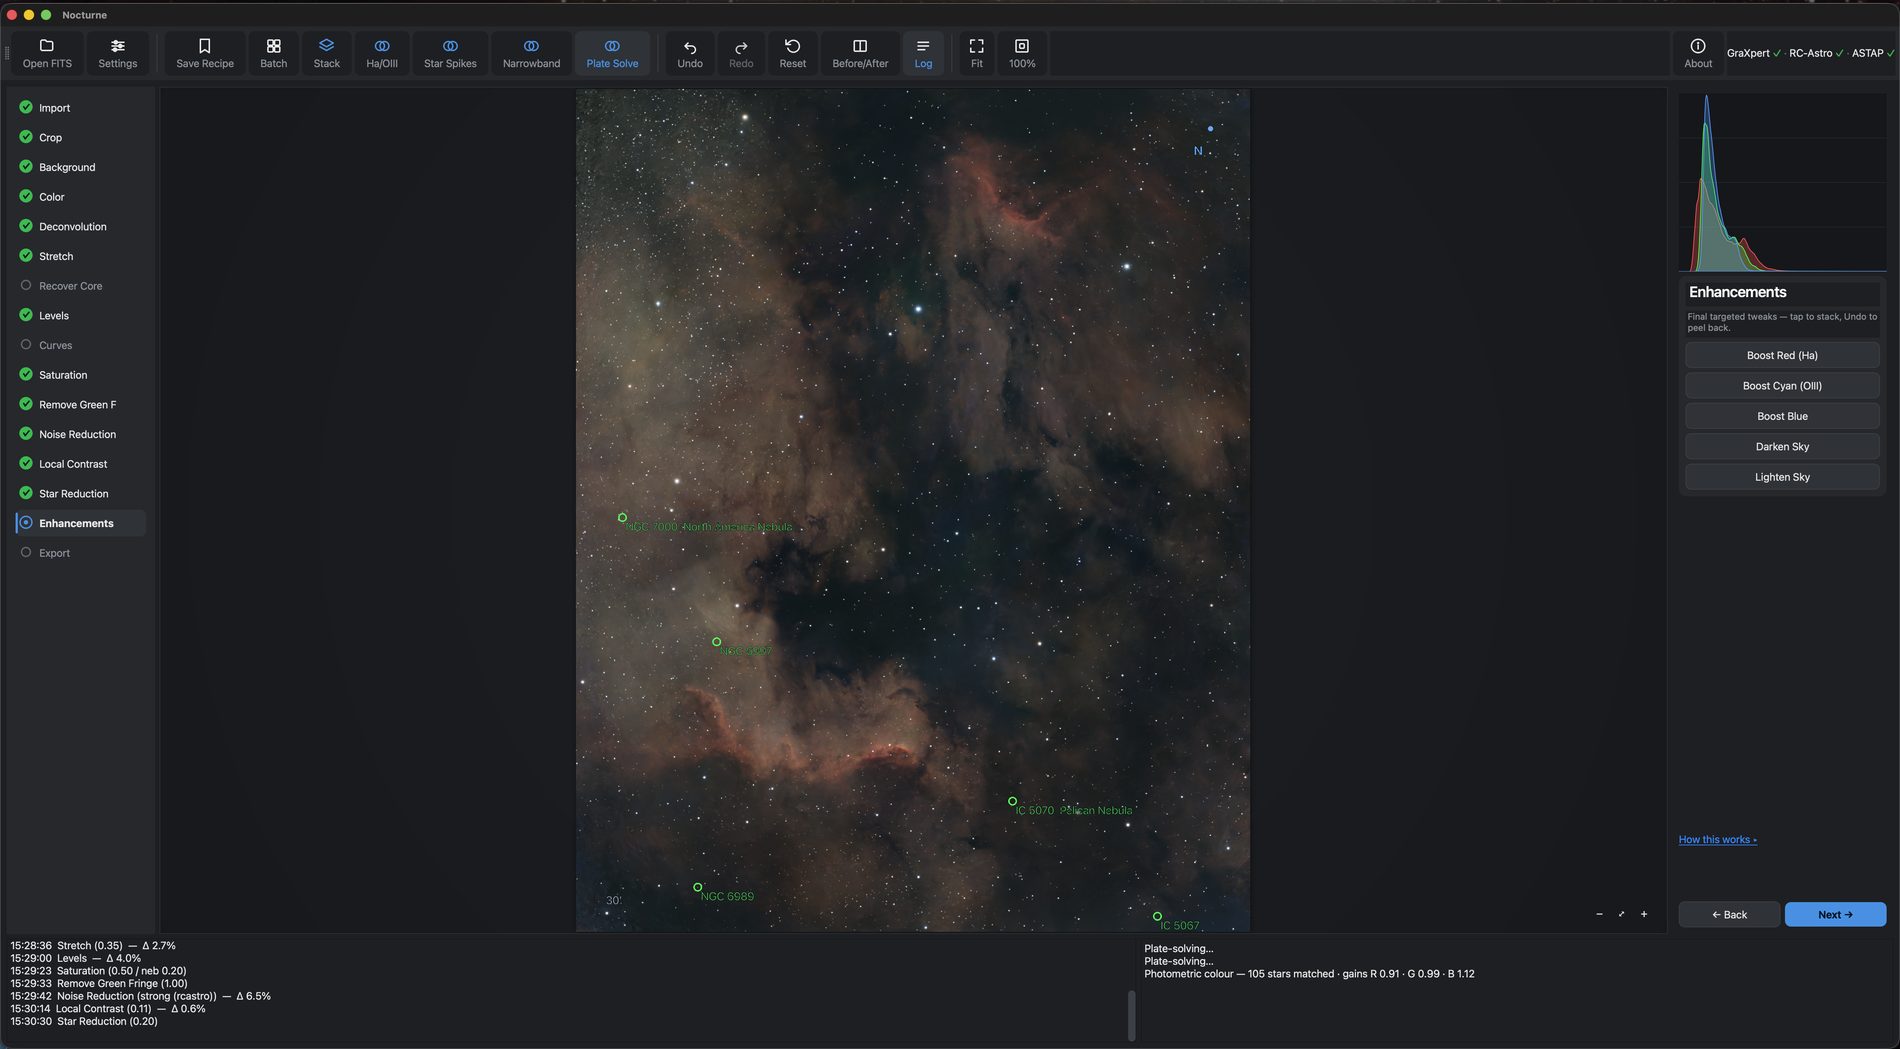
Saturation (with a masked nebula boost), Remove Green Fringe, Noise Reduction, Local Contrast and Star Reduction put on the final polish — each with a live preview and its own undo. Star reduction and the star-aware steps work even without RC-Astro, using a built-in star separator. Star Spikes can add artistic diffraction spikes if you like the look.
Enhancements & Export
Enhancements offers eleven tap-to-stack finishing moves — hue-selective colour boosts, vibrance, star colour, sky darken/lighten, dark structure, soft glow and nebulosity sharpening. Each tap is its own undoable nudge, so you can dial the effect in precisely. Export writes a finished 16-bit image (and, if you plate-solved, burns in the annotations and keeps the WCS in exported FITS).
Late fixes — Trim & fullscreen
Colour, at the end
Colour Balance (toolbar) is for the finishing colour work that used to mean exporting to another program. Pick a tonal range — shadows, midtones or highlights — and push it toward a colour; each range keeps its own settings, so you can warm the midtones and cool the highlights in one go. Then narrow Limit to so the change only touches a band of brightness: on a galaxy, that lets you colour the arms and leave the golden core alone. Tick Show the mask and the areas that will change light up while the rest dims, so you can see exactly where it lands. Your stars are separated out and laid back untouched, and because it appends to your history it never discards work you have already done — run it twice with different settings if you want.
Some problems only become visible once the image is stretched. A ragged stacking border at the frame edge is the classic one: invisible in the linear data, obvious at the end. Going back to the Crop step would work, but it discards every step taken since — an hour of work to remove twenty pixels. Trim exists for exactly this: it's a finishing tool, not a pipeline step, so it appends to your history rather than reaching back into it. Your whole edit survives, and undo still works.
To find those edge problems in the first place, press F for a distraction-free fullscreen canvas and pan and zoom around the frame. Esc brings the panels back.
Plate solving & annotation
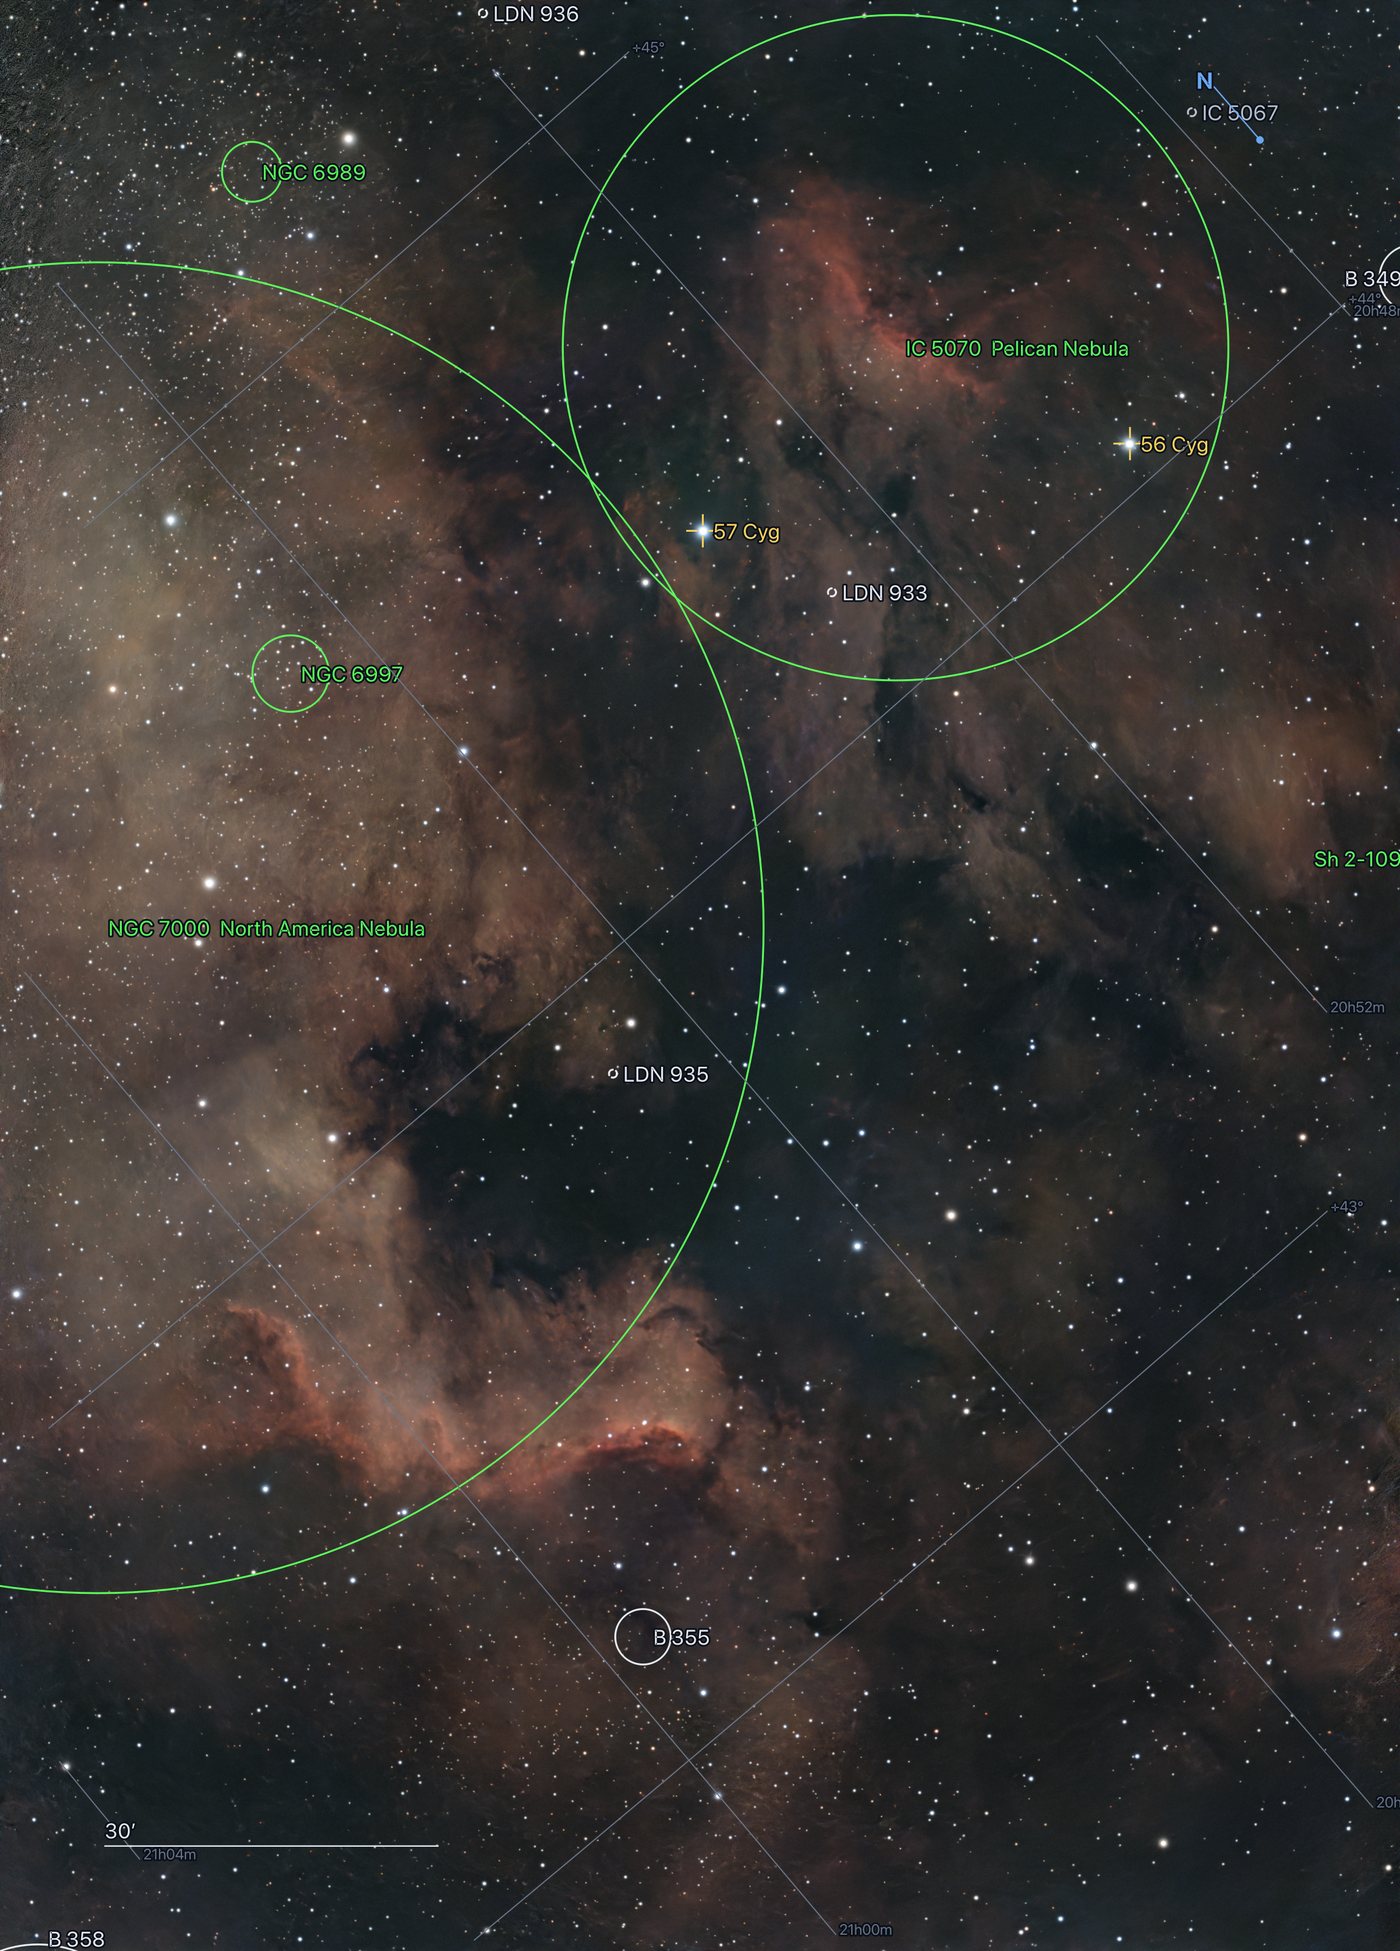
With ASTAP installed, Plate Solve works out exactly where your image points. Nocturne then identifies the target and can overlay deep-sky object labels, named bright stars, a compass and a scale bar — a great way to learn what's actually in your frame. Toggle the overlay on and off, and it burns into PNG exports if you want to keep it.