
Tools / Starless Levels
Toolbar tool
Starless Levels
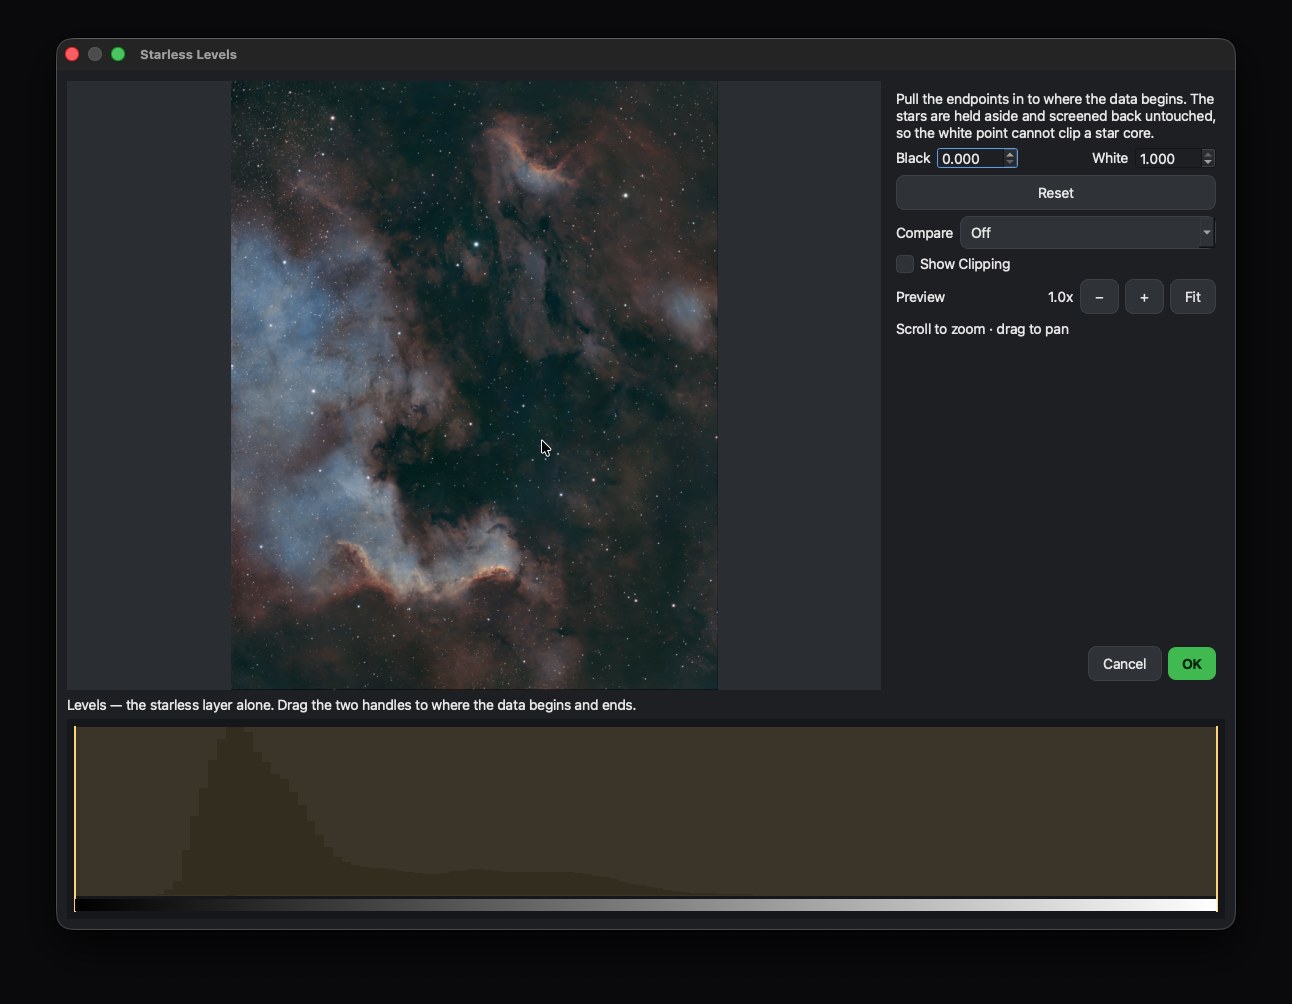
Pull the black and white points in to where your data actually begins and ends — with the stars held safely aside, so the move that gives you colour can't flatten a star core.
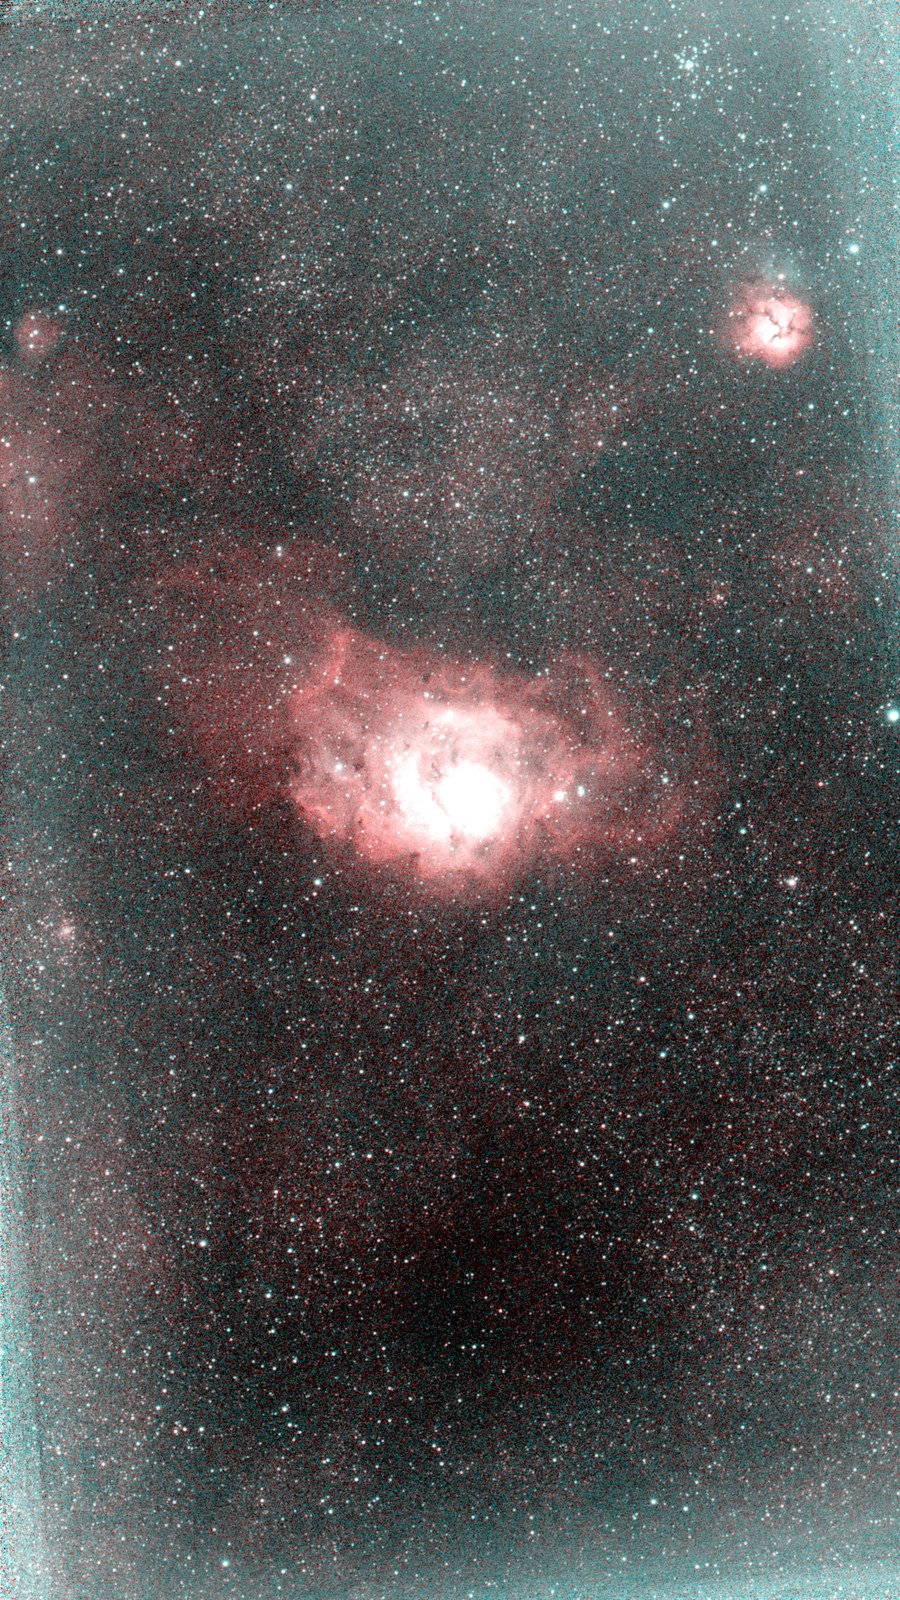
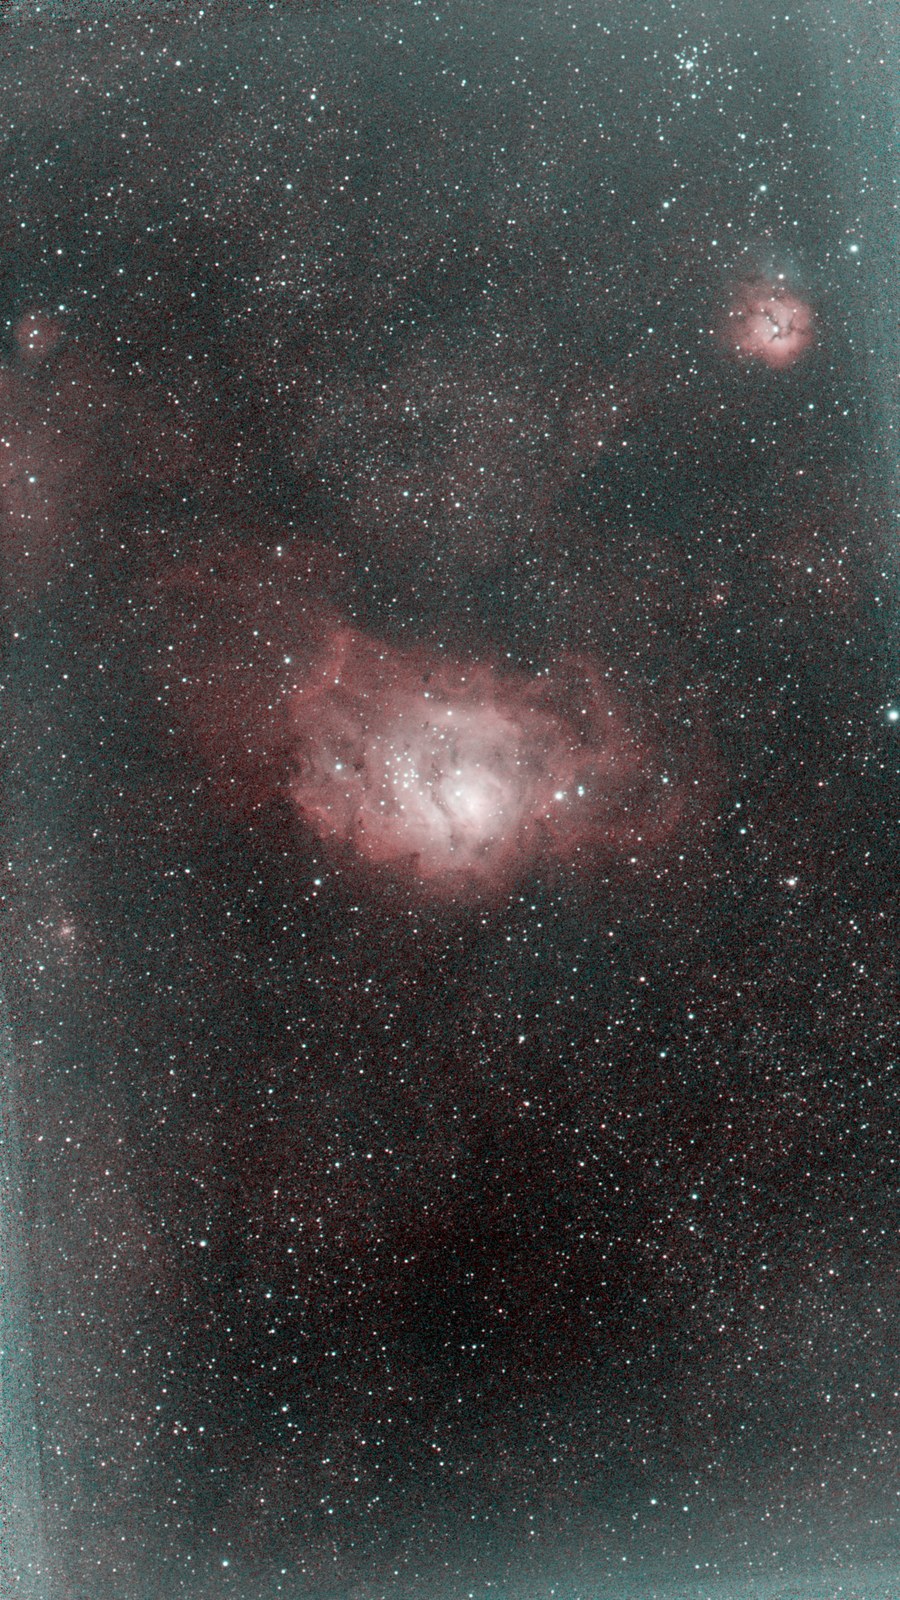 BeforeAfter
Drag to compare. Same frame, endpoints pulled in to where the data begins and ends — look at the stars while you drag: their colour is untouched.
Why this needs its own tool
Pulling the white point in is how you get colour out of a stretched astro image. It's also how you destroy star colour — and Nocturne's ordinary Levels step deliberately won't do it for you.
That refusal is measured, not cautious. A white point set at the 99.9th percentile drove about 0.08% of pixels to pure white on every master we tested — roughly six thousand star cores. Seestar star cores don't saturate in the capture, so that colour is real data, and once it's white it's gone.
On a starless layer, none of that applies. There are no star cores in it to clip. So Starless Levels takes the stars out first, makes the move on what's left, and screens the untouched stars back on top. The name is the argument: it's safe because it's starless.
The histogram is the instrument
Two handles on a large luminance histogram of the starless layer — not abstract sliders. You drag them to where the data begins and ends, which is exactly the judgement the tool asks you to make, and the histogram is the only thing that can answer it. Type the numbers instead if you'd rather; the boxes and the handles are the same control.
The histogram shows the starless layer alone, deliberately. Including the stars would put a bright tail on the right that your handles can't do anything about.
See what you're about to lose
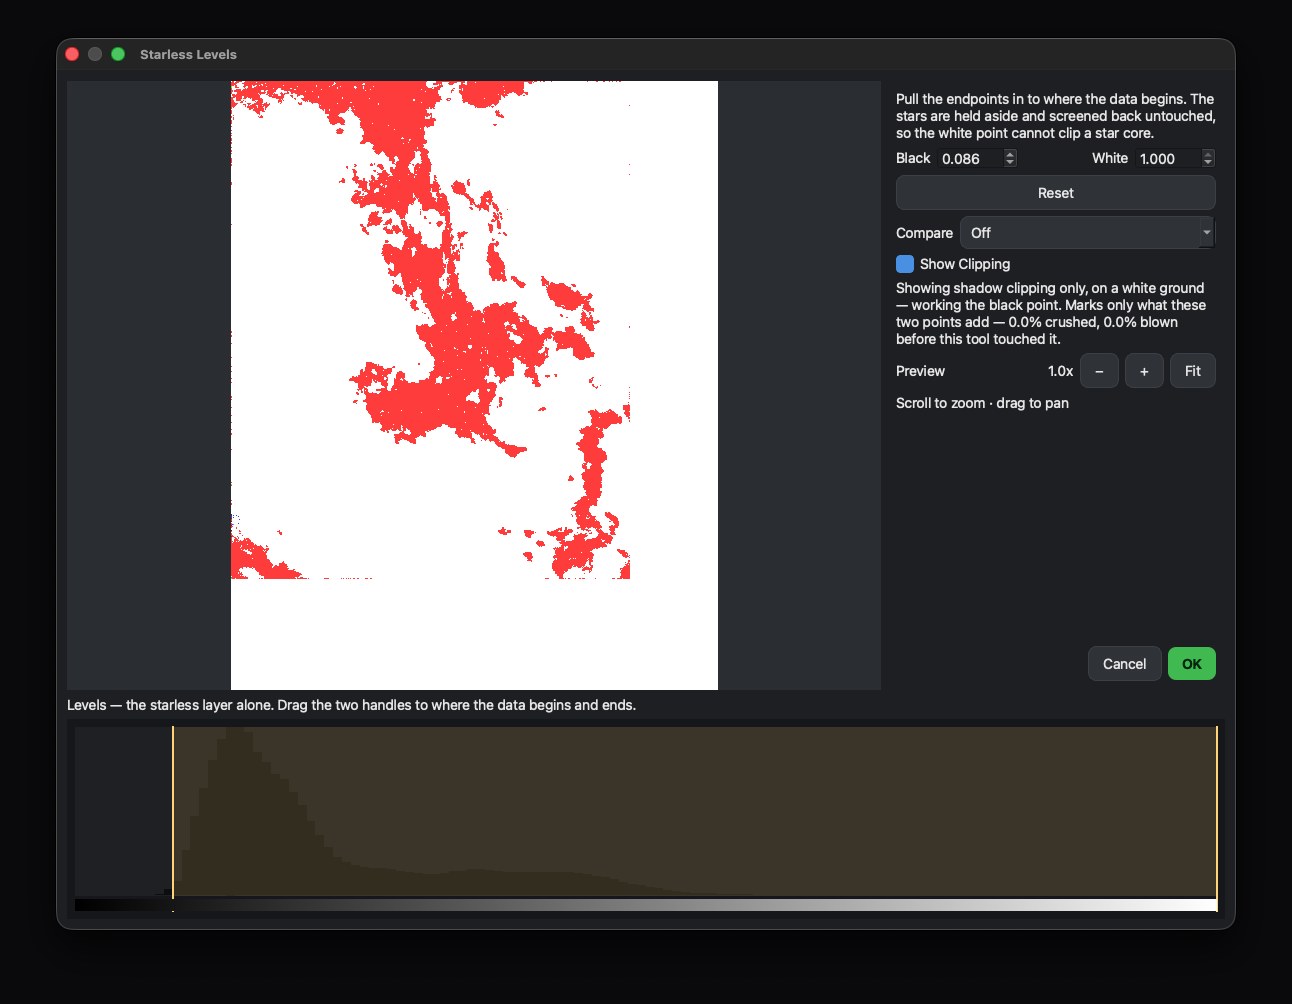
Turn on Show Clipping and the picture is replaced by a threshold view: everything goes flat, and only the pixels being clipped light up, coloured by which channel died. Drag until the first specks appear, then back off. If you've used Photoshop's Alt-drag on the Levels sliders, this is that — except it's a visible toggle rather than a modifier you have to already know about.
The ground follows the end you're working, as Photoshop does: white while you're on the black point, black while you're on the white point. Working one end against its opposite is what makes a single clipped pixel visible at all.
Two details worth knowing, because they're the difference between a readout you can trust and one you can't:
- It shows what you are adding. A stretched master usually arrives with some of its noise floor already crushed — the automatic black point does that by construction. Reporting the total would mean the black end always looked ruined before you'd touched anything. So the view marks only what your two endpoints add, and says the pre-existing figure in words underneath.
- A single clipped pixel survives to the screen. The preview is scaled down to fit your window, and an ordinary scale-down averages one blown pixel into invisibility. The clipping view is reduced by taking the brightest pixel in each block instead, so the speck you're hunting for is still there at full strength.
Compare while you work
Three ways to see the change, from the Compare control: off, a draggable wipe divider, or side by side with the panes labelled Before and After. Zoom and pan are shared, so both views move together — you're never comparing two different parts of the picture.
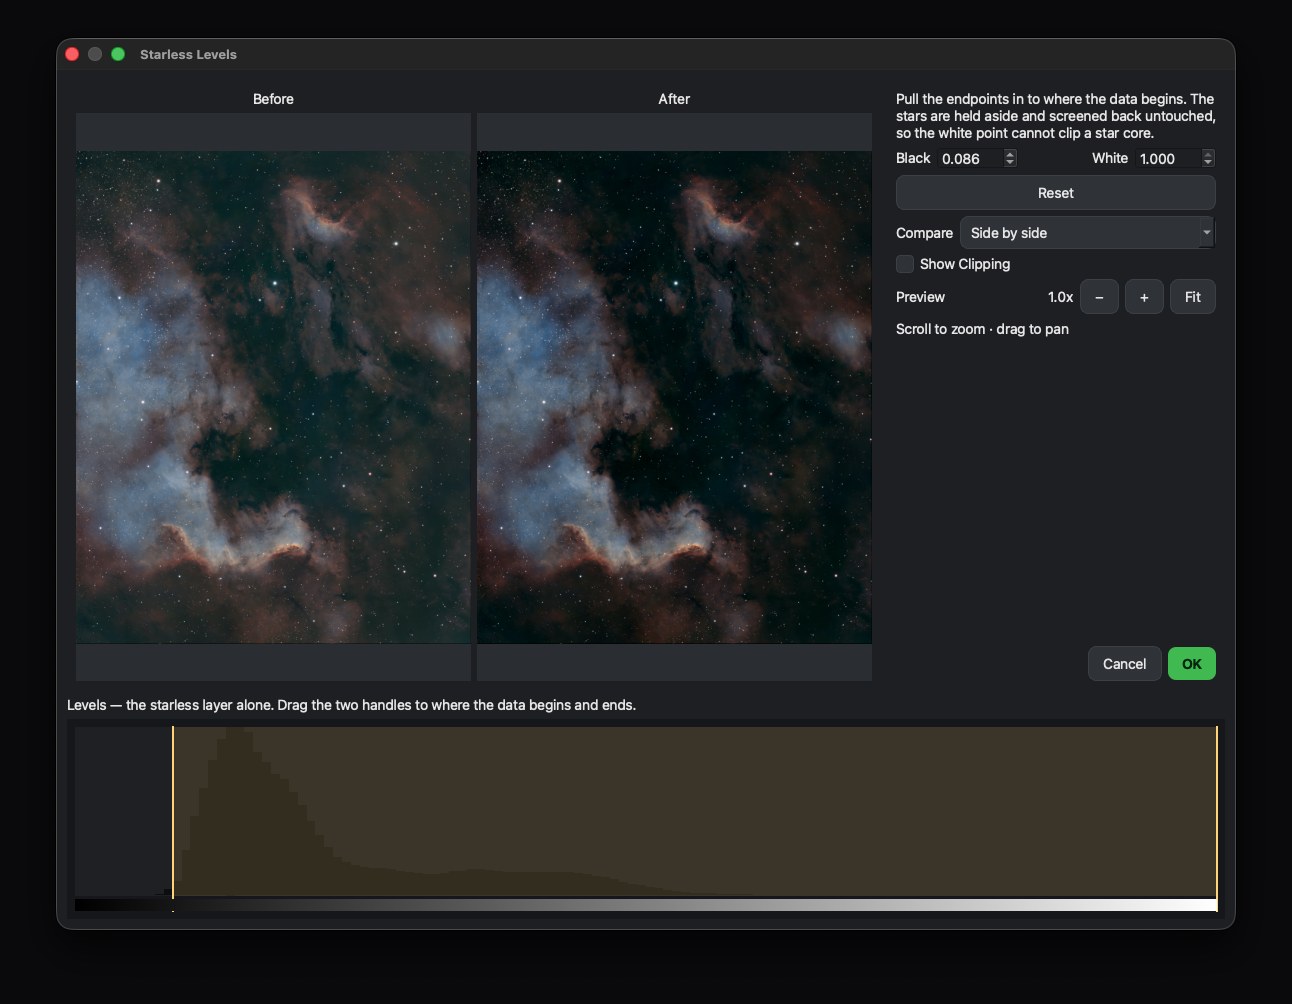
Reach for the wipe for tonal changes, where the shift is small and even; putting it in the same pixels is far easier on the eye than carrying a brightness memory across a gap. Reach for side by side when the question is structural — is that faint detail still there.
What it doesn't do
It doesn't touch your stars, and it doesn't touch the original: it appends one step you can undo, and the two values are written into the processing log and the provenance report.
It isn't saved into a recipe, on purpose. The whole reason this tool is manual is that no fixed pair of numbers works across images — we measured the same brightness landing anywhere from the 99.7th to the 99.99th percentile depending on the target. Replaying one image's endpoints across a folder of different objects would be applying a number that meant something somewhere else.
Where it sits
Late — after stretching, and after the colour work. It's a finishing move, alongside Star Spikes and Upscale Crop. Because it separates the stars first, it takes a moment to open; that's the split doing real work, not the app hanging.
It exists because there was a real ceiling on how far colour could be pushed inside Nocturne: the one move that lifts it most is the one that is unsafe on a full frame. Taking the stars out removes the reason for the ceiling, so the endpoints can go as far as the data allows — with the edit history, annotations and provenance record all still intact.