
Tools / Share
Toolbar tool
Share
Reframe a finished image for wherever you're posting it, put a caption on it that says what you want, and export or copy — without touching the original.
What it does
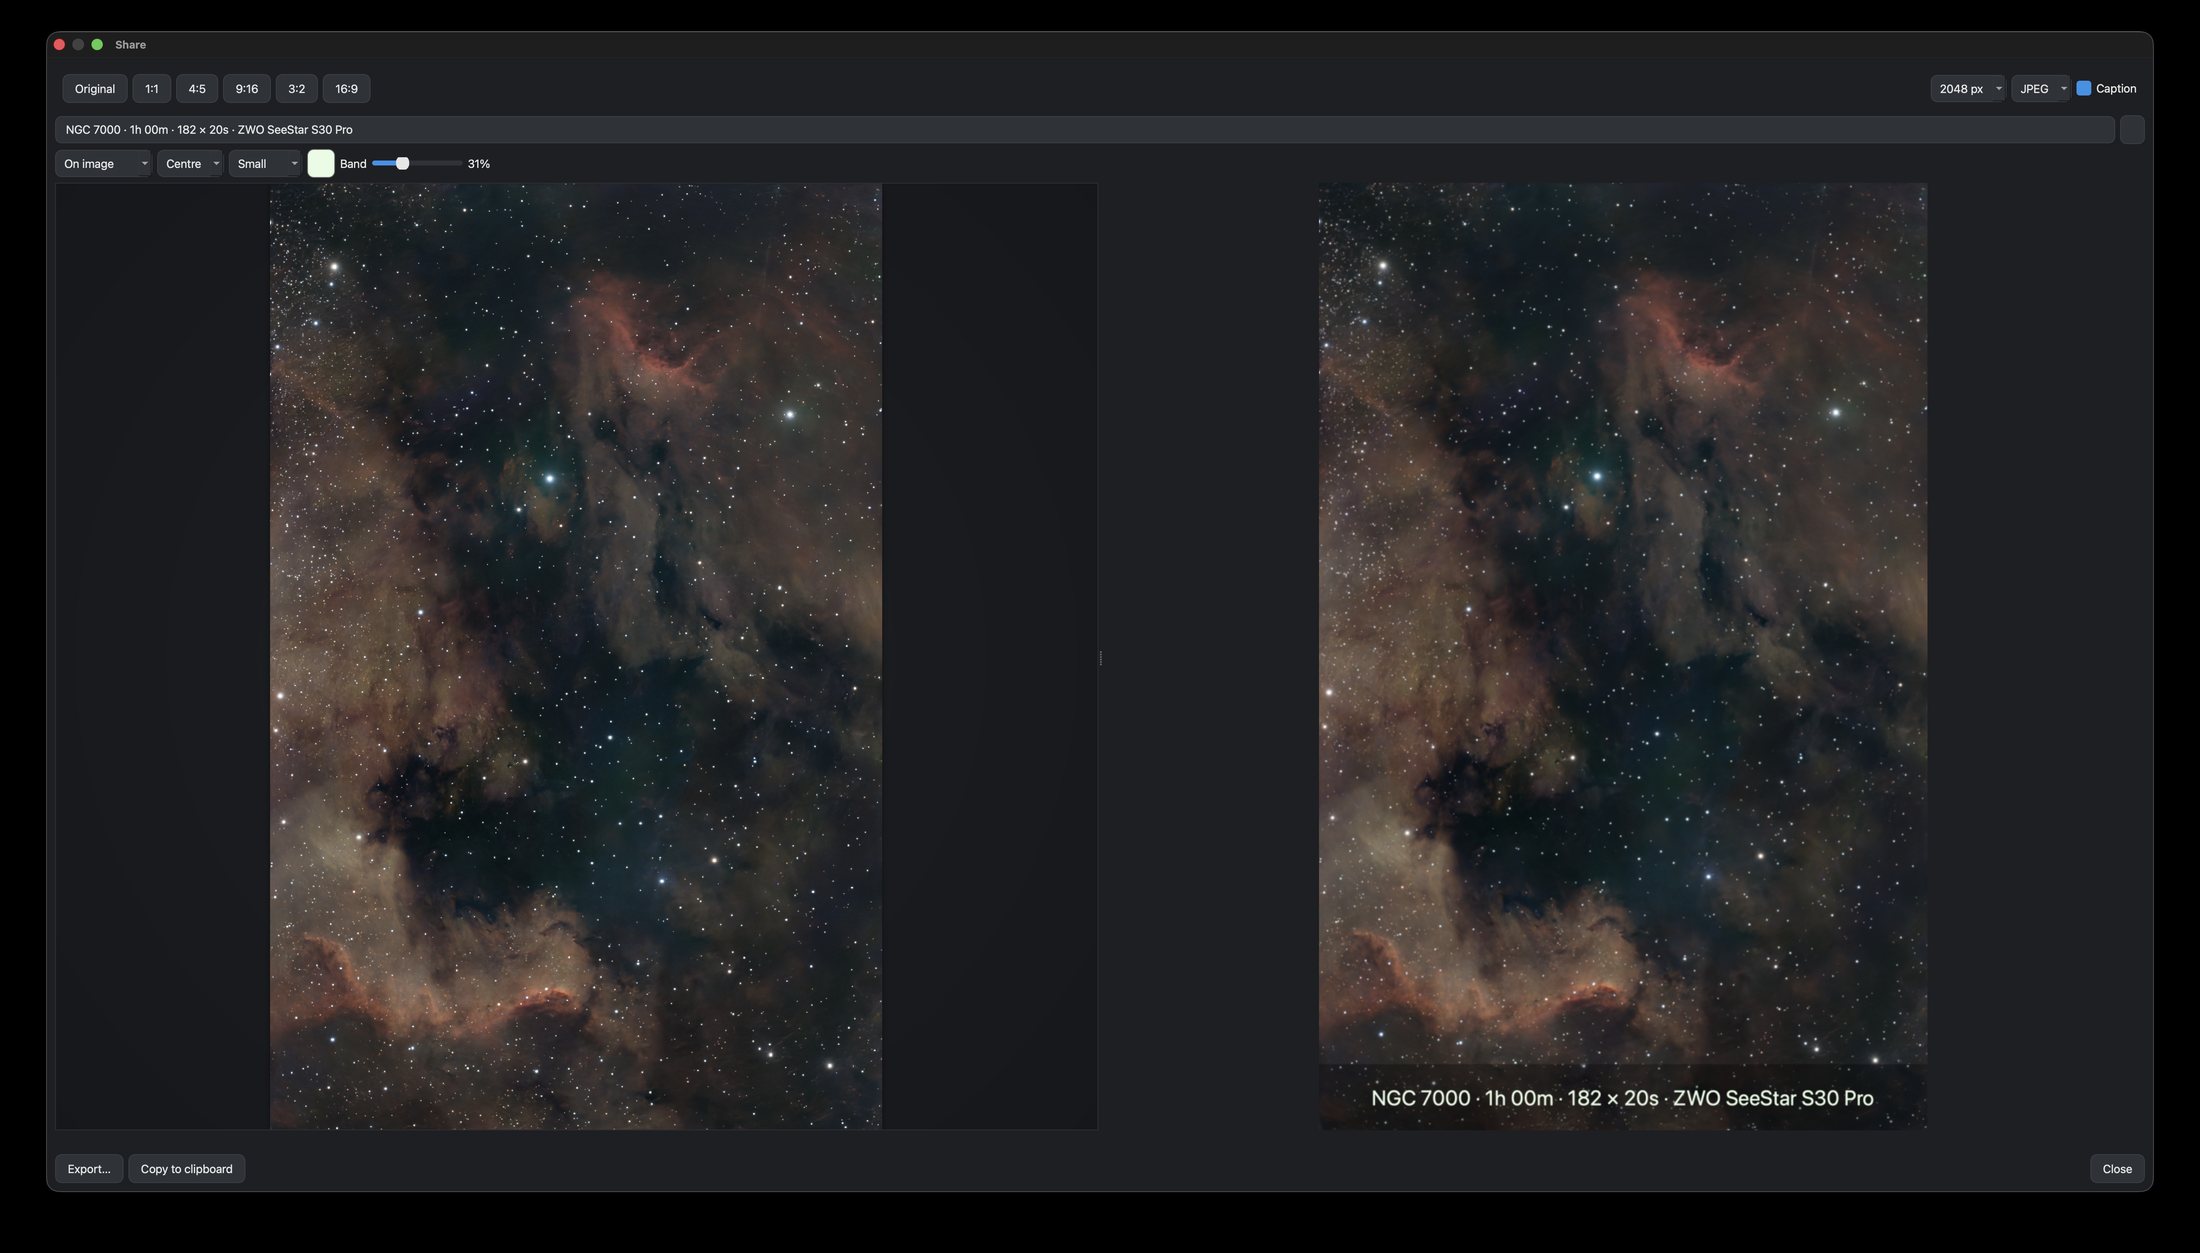
Takes the image you've just finished and prepares a copy for somewhere else — a square for a feed, a 4:5 portrait, a 16:9 banner — with a caption burned in. Your edit is untouched: Share never alters the project, it just produces a file.
The caption is yours
Nocturne writes a first draft from the image's own data — target, integration time, frame count — and then gets out of the way. It's an ordinary text field, so you can rewrite it, trim it to just the target, or say something that isn't in the metadata at all. There's a reset button if you want the generated line back.
- On the image or below it. On the image is a translucent band across the bottom; below extends the canvas instead, so nothing you photographed is ever covered.
- Left, centred or right, at three sizes — all relative to the image, so they stay right whichever export size you pick.
- Any colour, and a slider for how dark the band behind it is.
Set it once and it sticks: the styling is remembered between shares, while the text starts fresh for each image.
A nice trick: the colour picker has an eyedropper, so you can lift a colour straight out of the image you're captioning — a dusty rose from the nebula, or the warm white of a bright star. The caption then belongs to the picture instead of sitting on top of it.
Your annotations can come too
If the frame has been plate-solved, a checkbox switches the preview between the clean image and the annotated one — so a labelled picture still gets the reframing and the caption. The caption also knows what the solve found: if your file's header never named the target but Nocturne identified it, the caption uses that.
How to use it
- Finish your image, then click Share in the toolbar.
- Pick an aspect, or drag the crop box to frame it by eye.
- Edit the caption and style it to taste — the preview updates as you go.
- Choose a size and format, then Export… or Copy to clipboard to paste straight into a post.
Sizes only ever scale down. Asking for 4096 from a small crop will not invent detail, so the export tells you the pixel dimensions it actually produced.
What this tool cannot give youTips
Choose PNG if the image carries annotations or a caption at a small size — labels and text are hard edges, which is exactly what JPEG softens. JPEG is the better choice for a plain photograph.
Share needs a stretched image — it exports what you see, and a linear frame would come out black.